

Your Shark RV1001AE robot vacuum has been a loyal soldier in the battle against dust bunnies and crumbs. But lately, have you noticed it struggling to finish its cleaning missions? Or perhaps it’s taking longer to charge or conking out mid-cycle? These are telltale signs that your trusty robot’s battery might be nearing the end of its life. If you’re looking for tips on maintaining your vacuum or finding a replacement battery, you can explore resources like Idealhomesmiami for more insights.
Fear not! Replacing the battery in your Shark RV1001AE is a surprisingly straightforward task that can be accomplished with a few simple tools and a little bit of patience. This guide will walk you through the process, offering clear instructions and helpful tips to ensure a successful battery swap.
What You’ll Need:
- A replacement battery: Ensure you purchase a battery specifically designed for the Shark RV1001AE model. You can find these online or at your local electronics store.
- A Phillips head screwdriver: This is the most common type of screwdriver and is likely already in your toolbox.
- A small flat-head screwdriver (optional): This can be helpful for gently prying open the battery compartment.
- A clean, soft cloth: To protect your robot vacuum from scratches.
Let’s Get Started!
1. Power Down:
Before you begin any maintenance, ensure your Shark RV1001AE is completely powered off. Locate the power switch on the side of the robot and flip it to the “off” position (the circle with a line through it).
2. Remove the Dust Bin:
To give yourself more room to work, take out the dust bin by pressing the release button and pulling it straight out.
3. Flip it Over:
Gently place your robot vacuum upside down on the soft cloth. This will protect its sensors and finish while you work.
4. Locate the Battery Compartment:
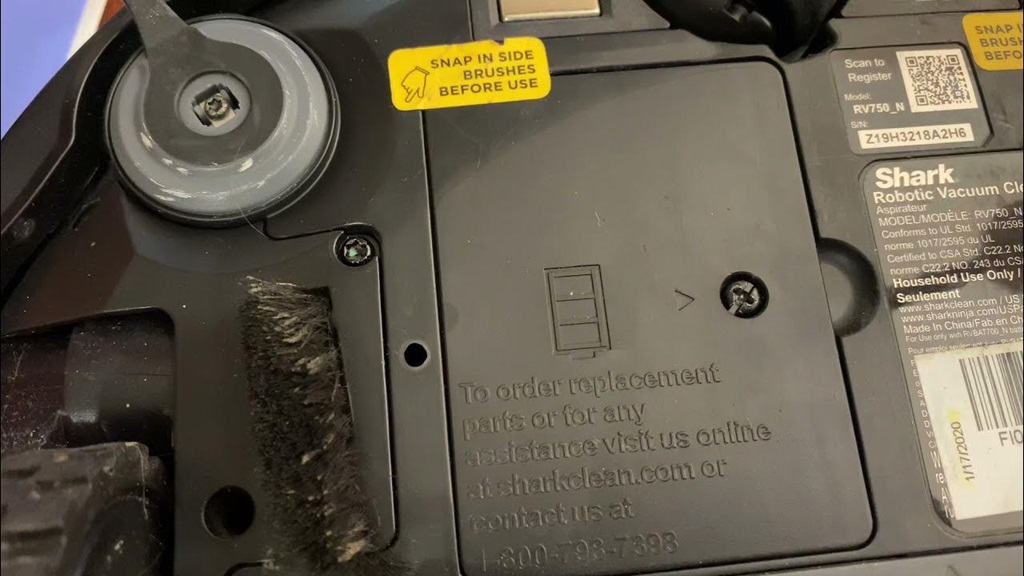
The battery compartment is on the underside of the robot, usually marked with a battery icon. You’ll see a small panel secured by two Phillips head screws.
5. Remove the Screws:
Use your Phillips head screwdriver to remove the two screws. Keep them in a safe place so you don’t lose them! The panel might stay attached, as some models have captive screws that don’t fully detach.
6. Open the Battery Compartment:
Gently lift the panel to reveal the battery. You might encounter some resistance, in which case you can carefully use the flat-head screwdriver to pry it open. There are usually small tabs or indentations to assist with this. If you experience any issues while trying to access the battery, such as a shark dustbin error 9, make sure to check that the panel is fully disengaged from any clips or locking mechanisms before proceeding.
7. Disconnect the Battery:
The battery is connected to the robot with a wiring harness and a connector. This is the trickiest part of the process. Look for a small tab on the connector. Gently press this tab while simultaneously pulling up on the wiring harness. It might require a bit of force, but be careful not to break the connector.
8. Remove the Old Battery:
Once the connector is detached, you can easily slide the old battery out of its compartment.
9. Install the New Battery:
Slide the new battery into the compartment, making sure it’s oriented correctly (it should fit snugly).
10 Reconnect the Battery:
Align the connector with the battery terminal and gently push it in until you hear a click. This confirms that the connection is secure.
Related: Ditch the Vacuum, Embrace the Hydro
11. Close the Battery Compartment:
Replace the panel and secure it with the two screws you removed earlier.
12. Power Up and Test:
Flip your Shark RV1001AE back over and turn it on. Allow it to charge fully and then send it on a cleaning mission to ensure everything is working properly.
Tips for Success:
- Take your time: There’s no need to rush. Work carefully and methodically to avoid damaging any components.
- Be gentle: The connector can be fragile, so handle it with care.
- If you encounter resistance, don’t force it: If you’re having trouble opening the compartment or disconnecting the battery, double-check that you’re following the instructions correctly.
- If you’re unsure, consult the user manual: Your Shark RV1001AE user manual should have detailed instructions and diagrams for battery replacement.
- Consider recording the process: If you’re a visual learner, it might be helpful to take photos or videos of each step as you go. This can be a useful reference if you need to replace the battery again in the future.
Congratulations!
You’ve successfully replaced the battery in your Shark RV1001AE robot vacuum. With its newfound energy, your robot is ready to tackle those dust bunnies with renewed vigor. Enjoy the convenience of a clean home without lifting a finger!

